
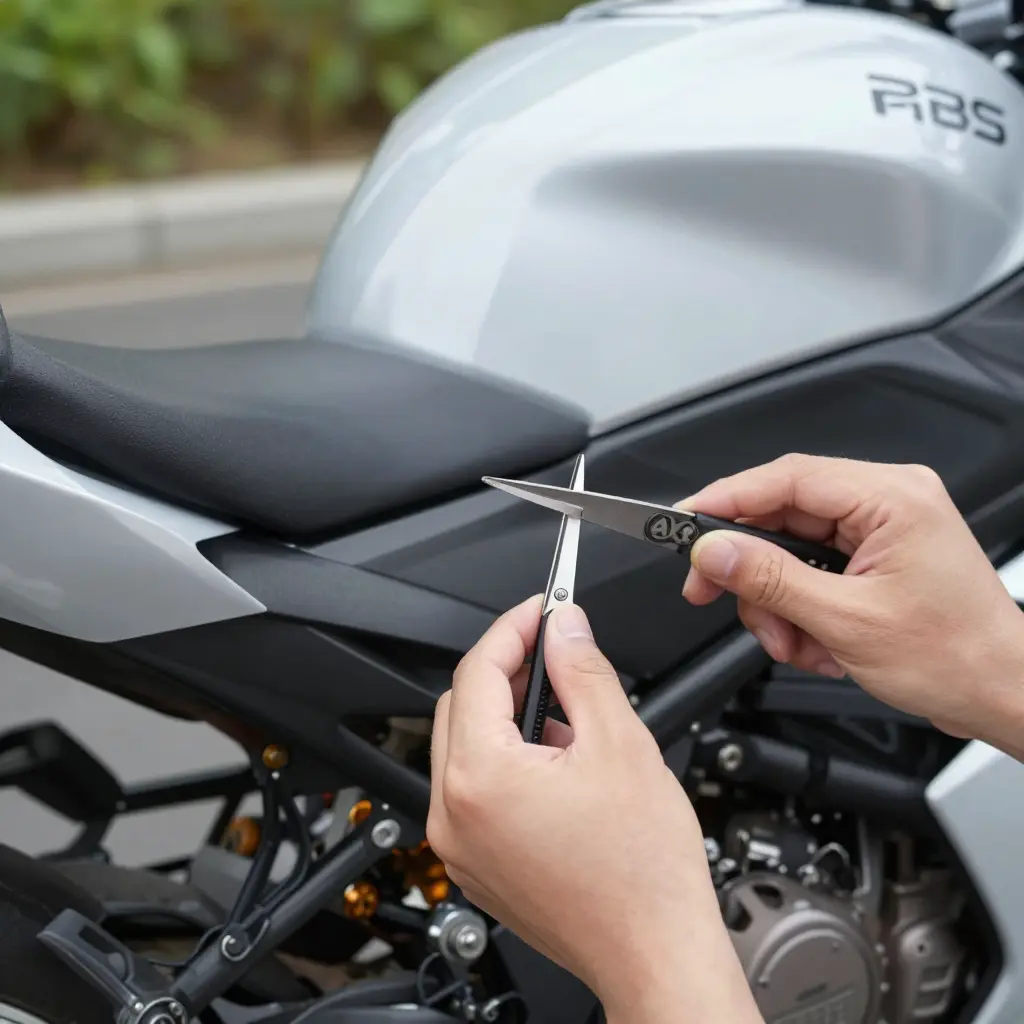
Fairing Panel Gaps: Heat Bending vs Trimming Aftermarket ABS Shells
Fairing panel gaps are the visible spaces between adjoining body panels: side fairings, nose cowl, tail section. When a gap runs uneven, too wide, or misaligned, the panels stop sitting flush, and the finished bodywork shows it.
Auto repair shops and enthusiasts run into these gaps most often while fitting aftermarket ABS shells. Aftermarket shells come out of smaller production batches than factory parts, so differences in molding, cooling, and shipping nudge panel geometry a little. Nudge several panels and the error adds up at seams, tabs, and fasteners once the shell is bolted on.
There are two ways to correct it. Heat bending warms a panel and reshapes its curvature; trimming cuts material away to change an edge or a tab. The deciding question is whether the edge needs to move or the material needs to go.
Why Aftermarket ABS Shells Develop Panel Gaps
Aftermarket ABS fairing shells rarely match OEM bodywork exactly. Five causes account for most of the gaps, and each one points to a different fix.
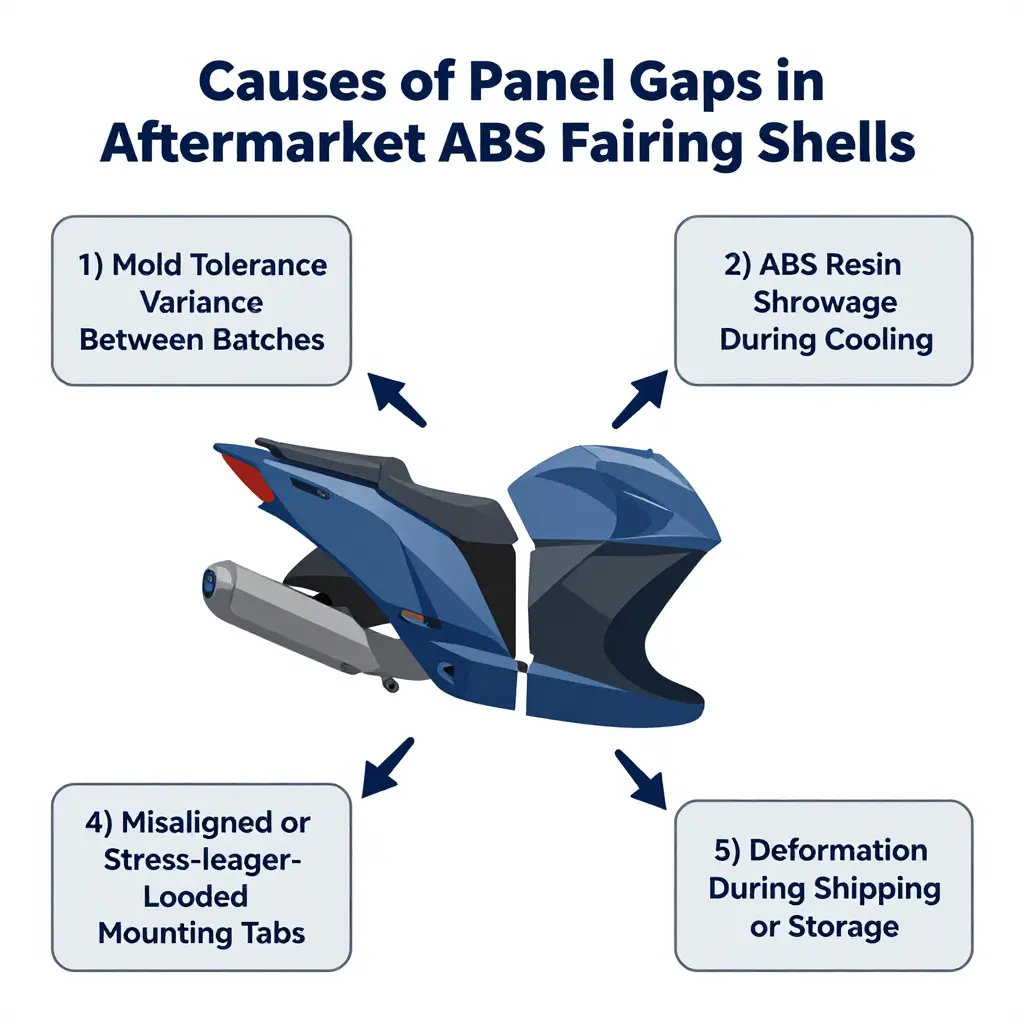
Mold Tolerance Variance Between Production Batches
Every production run uses its own mold, and tooling wears with use. A shell from one lot can sit millimeters off the next, and that difference compounds across a multi-panel assembly, degrading motorcycle fairing fitment at every seam.
ABS Resin Shrinkage During Cooling
ABS contracts as it cools in the mold. Uneven wall thickness and cooling rates produce uneven shrinkage, so flat sections pull in and edges curl. The shell comes out slightly small or distorted and opens gaps the moment it is bolted to the frame.
Thermal Expansion and Contraction
ABS expands with heat and contracts as it cools. Engine heat and direct sun raise panel temperature enough to flex the shell against fixed mounting points. Repeat that cycle often enough and the material deforms slightly, so gaps that close when hot reopen when the bike cools.
Misaligned or Stress-Loaded Mounting Tabs
Tabs molded onto ABS fairing shells can sit slightly off position or take on load during installation. When bolts force a misaligned tab into place, the panel stores stress that pushes back and widens the nearby seams.
Deformation During Shipping or Storage
Shells that are stacked, compressed, or exposed to heat creep out of shape before anyone installs them. A shell stored in a hot warehouse can bow permanently, distorting motorcycle fairing fitment before the first bolt is tightened.
All five end in the same visible result, but the cause differs, and the correction has to match the cause.
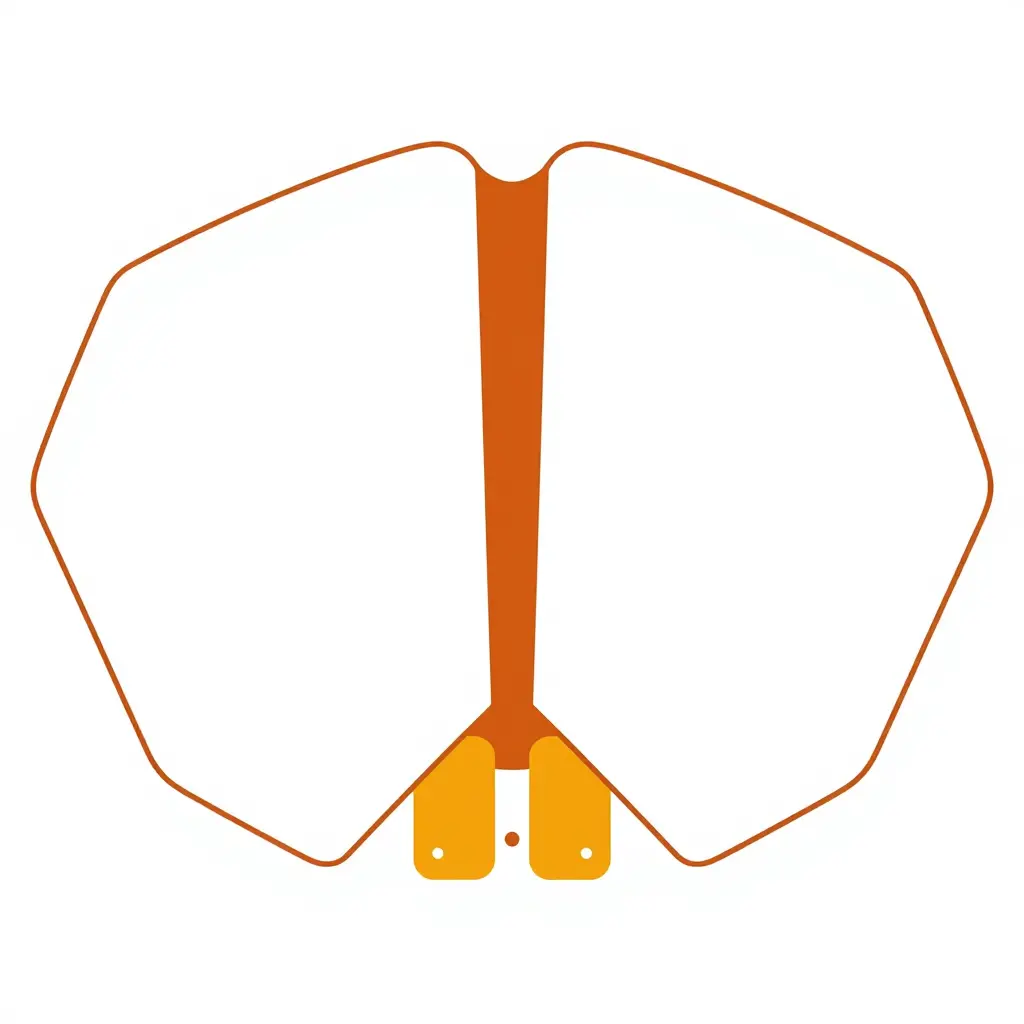
Two panels meet at a seam, with the gap marked between them and interlocking mounting tabs and a fastener below. Read the schematic for gap width and tab overlap before deciding whether to heat bend or trim.
Heat Bending Aftermarket ABS Shells
Heat bending reshapes an aftermarket ABS shell to close a panel gap by moving the existing edge rather than cutting it away. The technique works because ABS is a thermoplastic: warm it and it softens enough to move, cool it and it holds the new shape.
The Heat Bending Process, Step by Step
Apply heat first. Hold the heat gun well back from the surface and sweep it in steady circles so no single spot overheats. The panel should reach a reversible softening state, pliable but nowhere near melting. If the surface still looks glossy and feels firm, keep warming gradually instead of forcing it.
With the panel pliable, ease the edge toward the seam line using gloved hands or a padded block, and check alignment as you go. Small increments work; pushing hard or fast stretches the plastic into waves.
Let the panel return to room temperature on its own to lock the shape. Skip compressed air and cold water, because sudden cooling traps stress and can crack the plastic. Once cool, the shell holds the adjusted seam line.
Key Temperature and Timing Factors
| Factor | Recommended range | Why it matters |
|---|---|---|
| Safe softening window | 200-250 F (93-121 C) | Panel becomes pliable without damage |
| Reversible working range | up to about 280 F (138 C) | Keeps the change reversible |
| Overheat threshold | above about 300 F (149 C) | Gloss distortion and whitening begin |
| Pressure pace | small steps, 10-20 seconds apart | Prevents stretching and waves |
| Cooling | ambient air, several minutes | Avoids stress cracking |
Overheating is the main risk. Too much heat distorts the gloss, leaving dull or shiny patches, and can permanently cloud the plastic with whitening. Rapid or excessive heating also encourages stress cracks around fasteners and tight curves.
When Heat Bending Suits the Gap
Heat bending fits gaps where the panel edge has drifted away from the seam and the material still has some flex: a warped panel, a bowed edge, a tab sitting off the OEM position. Because it leaves the material intact, it is the method to try first when a correction might need to be redone. It does not suit shells with existing cracks or previous bodywork, or thick reinforced sections, where the material will not move predictably and can fail under heat.
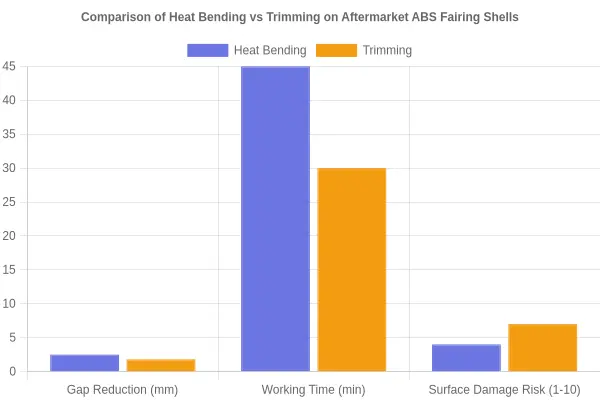
The pairs of bars compare the two methods on the same outcomes: heat bending closes more of the gap, trimming finishes faster, and trimming carries the higher risk of marring the shell surface.
Trimming Aftermarket ABS Shells for Seam Alignment
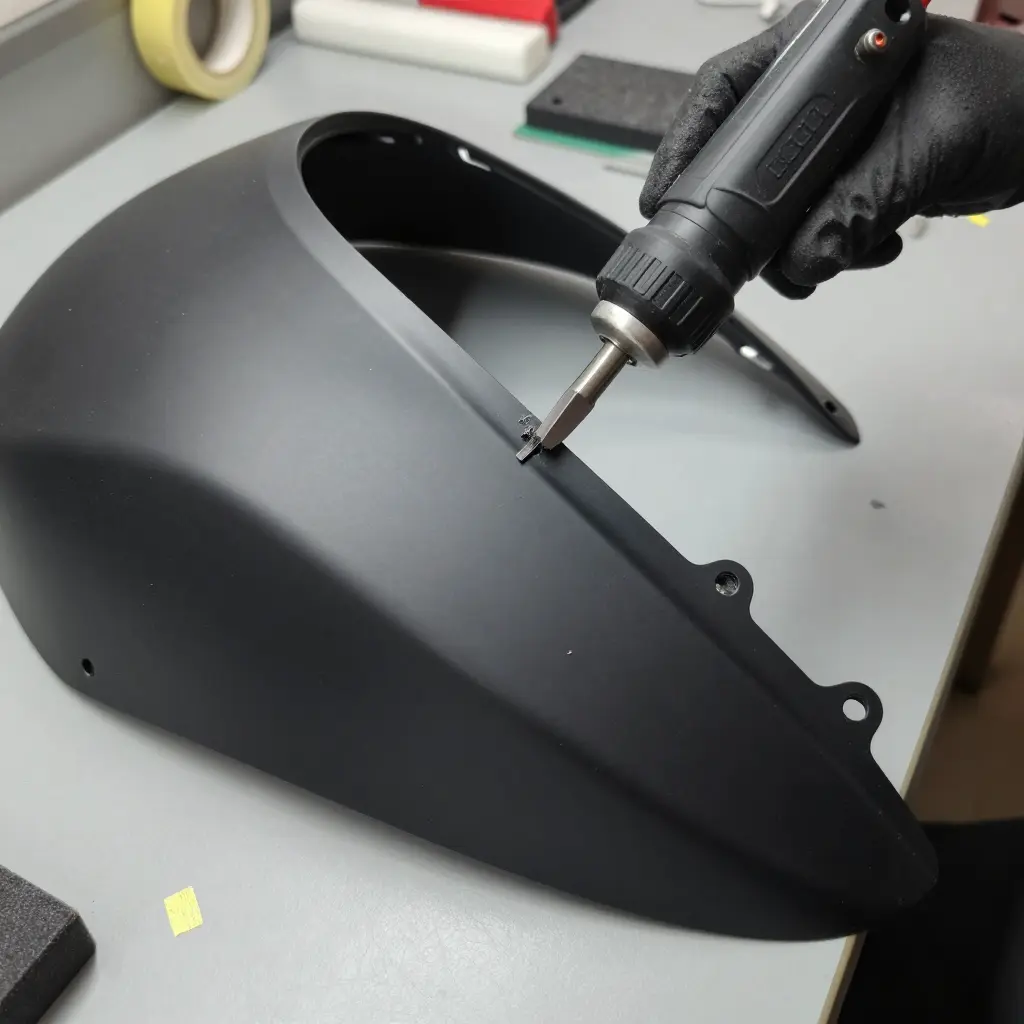
Trimming is subtractive, and every cut is permanent. Where heat bending reshapes a shell and keeps its material, trimming removes material to reconcile the geometry of ABS fairing shells with the surrounding OEM panels and mounting points so seams sit flush and body lines flow evenly.
Start by identifying what interferes. A dry test-fit reveals the high spots along a panel edge or the mounting tab that stops the shell from seating. Mark those contact areas with tape or a marker before touching a tool, so you cut only what actually blocks alignment.
Cutting and Sanding in Passes
Remove material in small, controlled increments. A rotary tool, fine-tooth saw, or body file shaves thin layers of ABS far more safely than one aggressive pass. After each cut, sand the edge smooth and reinstall the panel to check the fit. Repeat the trim-test-trim cycle until the seam aligns and the shell seats without force.
Gap Closure Versus Mounting Clearance
The two goals target different surfaces. Trimming for gap closure works the visible panel edge, where a few tenths of a millimeter changes the width of the seam. Trimming for mounting clearance works the hidden tabs and flanges, removing material so the shell clears fasteners and brackets without taking on stress.
The Irreversible Trade-Off
Because removal cannot be undone, over-trimming is the most common failure. A thinned shell weakens the panel and encourages flex, vibration, and stress cracks that spread over time. Edge preparation also governs paint adhesion: a feathered, sanded edge gives primer and topcoat something to grip, while a jagged cut invites chipping and peeling. Finish every trimmed edge to match the OEM contours, then seal any exposed ABS before the final coat.
Heat Bending vs Trimming: Side-by-Side Comparison
Use this reference to match the method to the gap in front of you.
| Criterion | Heat Bending | Trimming Aftermarket ABS Shells |
|---|---|---|
| Best-suited gap conditions | Gaps opened by a warped or bowed panel, or an edge that has drifted off the seam line | Overlapping panel edges, tabs and flanges that interfere, or contours that need evening |
| Reversibility | Semi-reversible; reheating can relax the panel again, but repeated cycles weaken the surface | Not reversible once material is cut away |
| Tooling required | Heat gun or infrared heater, plus clamps, jigs, and a temperature gauge | Rotary tool, sanding drums, files, and finishing abrasives |
| Primary risk factor | Overheating that warps, blisters, or glosses the ABS surface | Removing too much material, leaving thin edges and weak seams |
Reach for heat bending when the panel needs to move, and trimming when material needs to go. Matching the method to the fault is what keeps you from warping a shell or making an irreversible cut.
Best Practices for Fairing Panel Gap Correction
- Check the panel bias before adjusting: hold the shell against the bike, find which side is warped, and confirm whether the gap needs heat bending or trimming.
- Warm the panel evenly, sweeping the heat gun across a wide area rather than holding it on one spot, so the ABS softens gradually instead of blistering.
- Trim in small increments, taking thin slivers with a rotary tool and checking progress instead of cutting a large section in one pass.
- Refit the shell on the motorcycle after each pass and inspect the gap before doing more work, because small changes compound quickly.
- Mask painted, clear-coated, and neighboring panels with tape or heat-resistant shields to prevent scorching and scratches.
- Inspect tabs, clips, and bolt holes for cracks or stress marks before and after bending; weakened tabs create fresh misalignment.
- Rest the shell on foam or a padded bench so the panel does not flex or scratch while you apply heat or pressure.
- Mark reference points with tape lines or a grease pencil to record the original edge and gap as a baseline.
- Wait for the shell to cool fully before judging the result, since ABS continues to relax as it cools.
- Wear gloves and work in a ventilated space; heated ABS and the dust from trimming both carry health and safety risks.
The aim is a controlled job that stays as reversible as possible. ABS has a narrow working window, so overheating can warp a panel past recovery, and trimming removes material you cannot put back. Verifying the bias first, warming evenly, and trimming in small steps lowers the odds of cracked shells, burnt finishes, and wasted parts. It also produces consistent motorcycle fairing fitment, where panels sit flush and the seams read as factory-built rather than improvised.
Matching Aftermarket ABS Shells to OEM Mounting Points
Motorcycle fairing fitment comes down to how faithfully a replacement panel reproduces the factory mounting geometry. Three features decide almost everything: mounting tabs, alignment pegs, and predrilled holes.
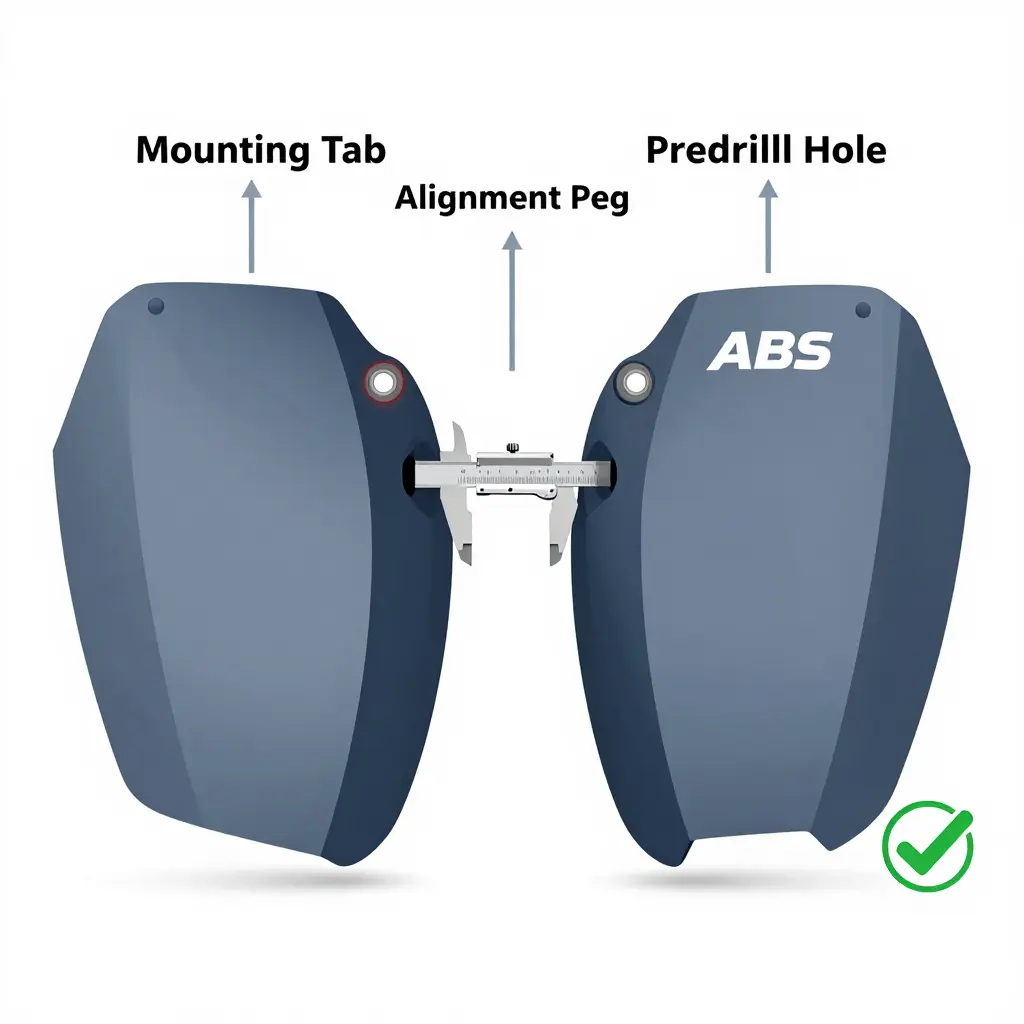
Mounting tabs carry the load. A tab sitting even two or three millimeters off the OEM position pulls the panel against its neighbors and opens gaps. Alignment pegs center the shell so bolt holes line up without force. Predrilled holes let fasteners thread by hand; stamped slightly wrong, they turn installation into a fight with cross-threading.
Inspect Against OEM Geometry First
Before touching a heat gun or a cutting wheel, measure. Place the OEM panel and the new aftermarket shell side by side on a flat bench. Use calipers to compare tab spacing, peg diameter, and hole centers, then test-fit with light hand pressure only.
If the shell seats with even, consistent gaps, no correction is needed. If it resists, mark the exact contact points. Misplaced tabs usually call for heat bending; oversized or intersecting material usually calls for trimming.
Heat Bending Versus Trimming
Heat bending repositions a tab or flange without removing material, so it stays reversible and preserves strength. Trimming cuts material away and cannot be undone, so it comes last in the sequence. Which applies depends on what your measurement showed.
Why Tighter Tolerances Pay Off
Shells built to closer tolerances drop in with less fuss, which cuts labor and rework. For riders and shops, Summit Fairings (summitfairings.com) offers over 3,000 styles across almost all motorcycle models at 10-40% lower prices than other sites, with a six-hour response promise for any question.
Frequently Asked Questions About Fairing Panel Gaps
Does heat bending weaken ABS plastic?
Not when it stays inside the material’s safe softening range, about 200-250 F (93-121 C). At those temperatures the polymer chains relax and reposition, so the panel flexes into a new shape and keeps its structural integrity. Problems start when the plastic is overheated or held near its melting point, which degrades the resin and leaves the shell brittle over time.
Does trimming void a warranty?
Trimming generally voids the manufacturer’s warranty on aftermarket ABS shells, because it alters the part from its tested, as-shipped dimensions. Most suppliers end coverage for fitment and finish claims once a panel is cut, sanded, or reshaped. If you have to trim, document the work and confirm the seller’s policy in writing first.
Which method suits large gaps versus small gaps?
Gap size is less useful than the cause. Heat bending handles gaps that opened because a panel warped or an edge drifted from the seam, and it can take up a few millimeters of misalignment. Trimming handles the opposite condition: material that overlaps, protrudes, or blocks the shell from seating, where nothing short of removal creates clearance. Cutting into a wide gap only makes it wider, which is why trimming is the wrong tool there.
How can I avoid cracking during heat bending?
Heat the panel evenly across a wide area and apply slow, steady pressure instead of forcing the bend. Warm both sides of the ABS and stay below the point where the surface turns glossy or starts to bubble. Supporting the panel from behind and bending in small increments further reduces the chance of stress fractures.
Can fairing panel gaps be corrected after painting?
Yes, but it is riskier and costs more. Heat bending a painted shell can blister, discolor, or crack the finish, so most shops either strip the panel first or apply heat very cautiously in one area. A correction made after paint usually needs spot refinishing to blend the repaired area.
How do I select the correct method for a given shell?
Start with the cause. If the shell is warped or a tab sits off the OEM position, heat bending moves the panel without losing material. If an edge overlaps, a tab is too thick, or the shell will not seat because material is in the way, trim. When a shell shows both problems, bend first to keep the material intact and trim only as a final adjustment.
Choosing the Right Correction Method
The choice comes down to what the gap actually needs. When a panel gaps unevenly because the shell is warped or the mounting points sit off, and the correction may need redoing, heat bending is the better tool. When excess material has to come off to create clearance or straighten a contour edge, trim. Neither method should be applied before the mounting geometry has been checked and the shell inspected, since hidden cracks, thin spots, or distorted tabs will undermine any correction.
Measure the gap first, then match the method to the fault. Warm and reshape when the shell itself needs to move; cut only when material genuinely has to go. Re-check fitment after each small adjustment rather than making one large, irreversible change.
For closely matched motorcycle fairing shells that make both techniques easier to apply cleanly, Summit Fairings (summitfairings.com) is a source to consider.